Windows 10 virtual machine on PopOS 20.04 with GPU passthrough
As you can see from the specs I will also passthrough an USB PCI-e card, as it can be quite difficult to passthrough any USB ports that are directly on your motherboard. For example I tried to passthrough some USB ports in my motherboard to Windows, but unfortunately it didn’t work or it resulted in hanging up the whole system. That’s why I would recommend getting a seperate USB PCI-e card. Other solution is to passthrough each USB device by device (instead of passthrough the whole USB port), but in that case when you want to passthrough a new USB device, you would need to then add that device to the list of devices that you want to be passed through. Second problem that you might encounter with this solution, is that if your USB device gets disconneted and reconnected again, the virtual machine might not find the USB device again until you restart the virtual machine. For example I have a hardware KVM which I use to switch my mouse and keyboard to different computers, in this case the seperate USB PCI-e card is much better solution.
Then I would just in case test that you can connect to the computer from another computer. By using the following command from the other computer (if you are using Linux or Mac on the other computer):
All the different devices that are related to the GPU are listed consecutively, and they will belong to the same group (in my example: 35:00). You can see from the list that my GPU card has been listed four times: VGA compatible controller (video), Audio device (as most cards can output audio through HDMI/DisplayPort, so you will probably also have this one), USB controller (this might be a bit more rare as my Nvidia card has also an USB-C connector, so you might not have this entry), Serial bus controller. You should then write down the GPU’s PCI bus ids (35:00.0, 35:00.1, 35:00.2, 35:00.3), device ids (10de:1e87, 10de:10f8, 10de:1ad8, 10de:1ad9) and also what kind of device it is (VGA, Audio, USB and Serial Bus). For the device ids it is enough to write down only the ids that are listed on the title of each entry. For example I would write down on my VGA combatible controller only 10de:1e87 (don’t need the 1462:3728).
And if you happen to make a mistake, for example if you put wrong device ids, you can delete the changes with the following command (for example if I would want to delete the above changes from my kernelstub, I would use the following command):
But if you can’t still see anything, then I would recommend to turn off the computer and then switch the GPUs’ places (so put the AMD GPU to the first slot and then Nvidia GPU to the second slot). You should then able to boot normally and you can then try to backtrack, if you missed anything.
This is an optional step as in new Nvidia drivers for Windows there shouldn’t be any problems running consumer Nvidia GPUs under VM. But in older Nvidia drivers, Nvidia blocked running consumer GPUs under VMs. Basically after you installed Nvidia drivers in Windows, the drivers wouldn’t load after reboot and Windows’ Device Manager would show Error 43 under the Nvidia GPU. You wouldn’t able to change resolution or use 3D accelaration. To counter the Error 43, we will provide a fresh copy of the GPU’s vBIOS. For example in my case as I will passthrough the GPU in the first PCI-e slot, when I start up my computer the BIOS will show up on Nvidia GPU (before the video output would move to my second GPU when the PopOS will start to load). At this point when the BIOS is loaded, the Nvidia GPU will be marked as initialized. But when I go to my VM side, and I start up my Windows VM, the Nvidia CPU would know that it has been initiliazed in another OS first (so it is running under a VM). And at this point the Nvidia drivers would block using the Nvidia GPU and not load the drivers.
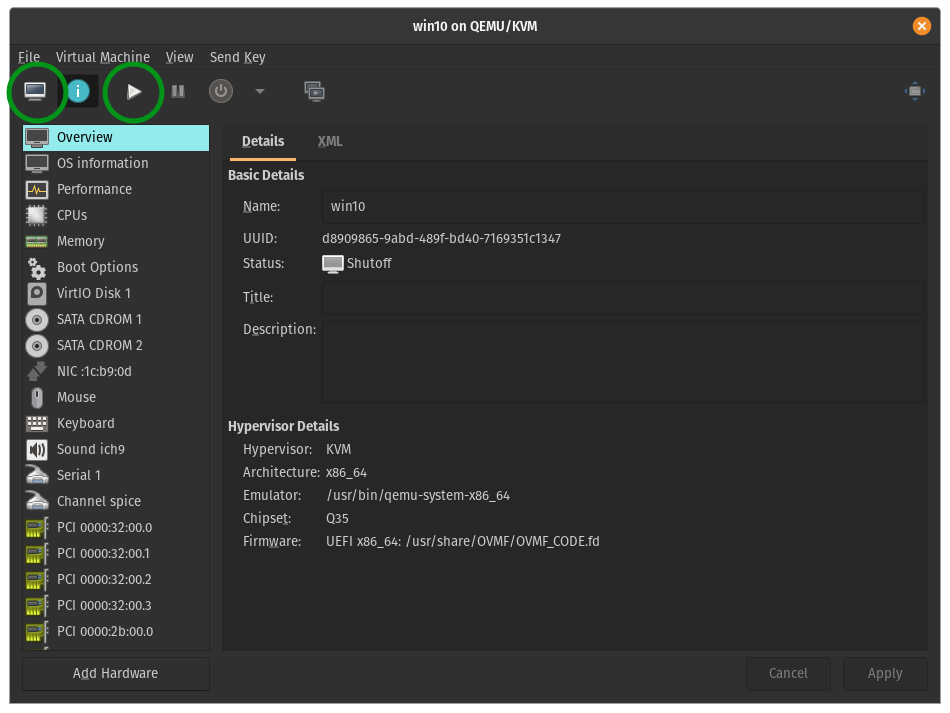
Finally we are ready to start the VM. Optionally if you prefer to Windows not automatically install your GPU drivers, but install the drivers yourself, then you should now disable your network connection. Now we click the Run button to start the VM. And then the Monitor button to open the monitor tab. Because we don’t yet have any drivers, you might not get any video output through your GPU at this point. But don’t panic, we can see video output inside the monitor tab (of course this won’t be GPU accelerated, but this shouldn’t matter for the intallation process).